Tag: ReadyNAS Fan Replacement
ReadyNAS Duo Fan Replacement
by Fredrik on Nov.19, 2009, under Technology
While the ReadyNAS Duo provides easy, out of the way storage with online 24/7 access to files and folders over a diverse range of services (such as FTP, SCP, HTTP) it is notorious for the noise it makes. The noise can be traced to the stock Crown 60 mm fan and to the high pitch resonating sound that is caused when the air pushed by the fan passes through the fan finger protection on the rear casing. Replacing the fan and removing the protective grating is easy and straightforward, but will void the warranty of the NAS and build approximately 6.5 cm / 2.6 ” on the rear of the unit. On the flip side of that is that the mod will result in a quiet NAS. You will need to pick up the parts listed below, a Phillips screw driver, a pair of pliers and invest 10 minutes of your time.
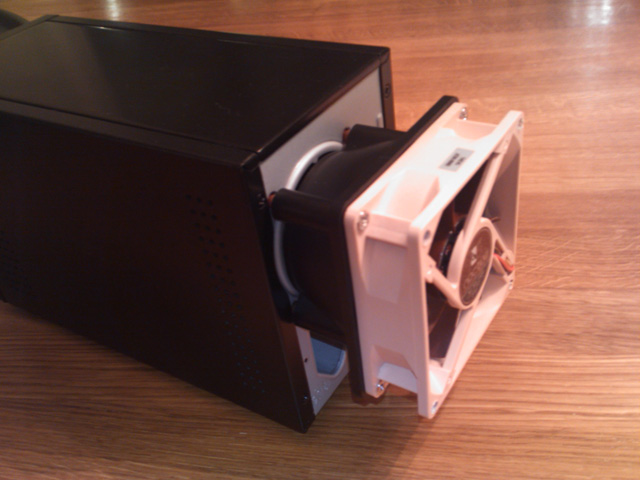
The picture above shows the finished fan mod without the fan grill.
Parts:
- Noctua NF-R8 80 mm fan
- 60 mm to 80 mm fan adapter
- 80 mm fan grill
The Noctua NF-R8 comes with a complete set of rubber isolation connectors and cable adapters.
Steps:
- Turn off the device
- Disconnect network and power cables
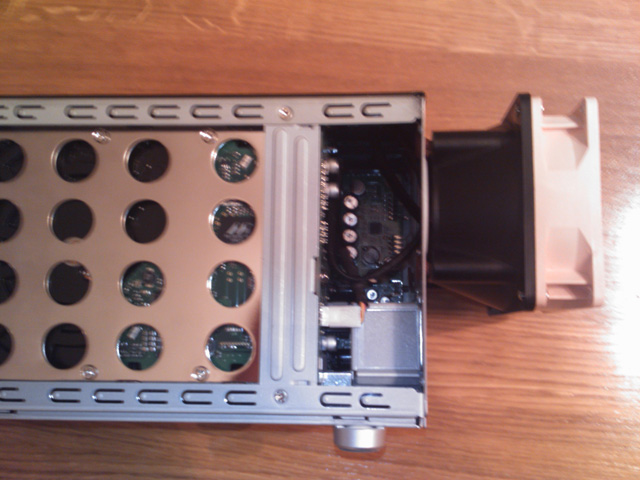
- Remove the drives
- Remove the left side panel (two screws on rear, then pull backwards)
- Disconnect the stock fan cable from the circuit board
- Remove the stock fan (four screws on rear)
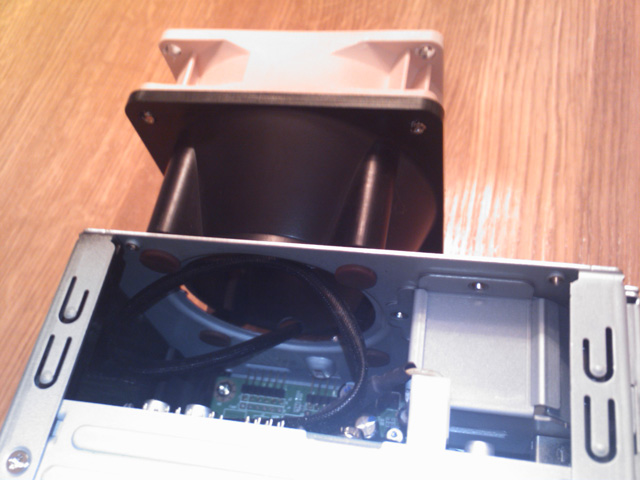
- Cut the stock fan finger protection with a pair of pliers and remove
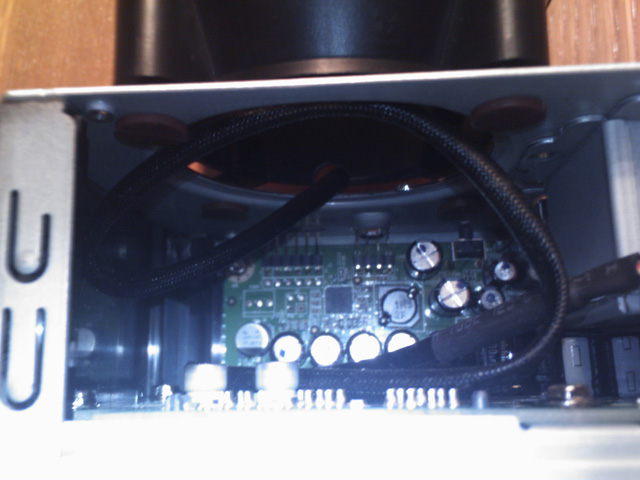
- Wire the Noctua NF-R8 through the rear casing
- Fit the 60 mm to 80 mm adapter to the rear of the NAS using the rubber isolation connectors that came with the Noctua NF-R8
- Fit the Noctua NF-R8 on the adapter using the four metal screws that came with the Noctua NF-R8
- Fit the fan grill to the Noctua NF-R8
- Connect the Noctua NF-R8 cable to the ReadyNAS (same socket as the stock fan)
- Refit the left side panel (top screw needs some angle from the screw driver, but should come around)
- Reattach the drives
- Reconnect the network and power cables
- Power up
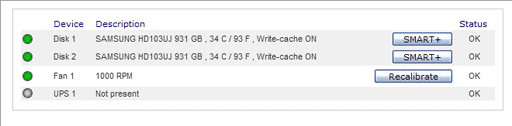
- Recalibrate the fan in FrontView (Status -> Health -> Recalibrate)
My drives ran at 2 000 rpm / 38°C with the stock fan and with an ambient room temperature of 21°C (inside a closed bed side table/cabinet), and now run at 1 000 rpm / 34°C with the Noctua NF-R8 fan (they idle at 1 000 rpm / 22°C). To reduce the minimum fan rpm below the factory default (1 600 rpm) you need to install the EnableFanMinRPMOverride add-on.
The life expectancy of the hard drives increase with lower operation temperature, which is a result of the bigger (80 mm) fan being capable of moving bigger quantities of air. The bigger fan also allows for lower rpm:s (the same result is achieved with less effort). A reduction of the minimum fan rpm will increase the drive temperature but will reduce the noise even further. Modify the minimum fan rpm value on your own risk.
Waiver. Replacing the stock fan will void the warranty of the device. The text in this summary has been prepared with uttermost care but is, despite of this, strictly a guide to be used in conjunction with normal and cautious computer practice, including the safe operation of electric equipment. I cannot accept liability for your actions. Work smart! Work safely!
-
Welcome to fredriklofter.com!
Thanks for dropping by. If you're new here you may want to check out the about page. I mostly write in English, but here and there you'll find posts in Swedish (my native toungue). Don't let that stop you, though - Google Translate will help you stay tuned (as will a subscription to my RSS feed). Enjoy!
Search this site:
 Custom Search